Once your Chargify account is created, you will have access to required information to continue your onboarding in the app.
A. Configure API Keys
Follow these instructions to find and enter your Chargify API Key and additional information.
Enter your Store Subdomain
- Click the blue 'Add API Keys' button in step 2(A) of the in-app onboarding panel.
- In a new tab, log into your Chargify Account
- From the URL, copy your Chargify store subdomain (see image below)
- Enter the subdomain in the first field
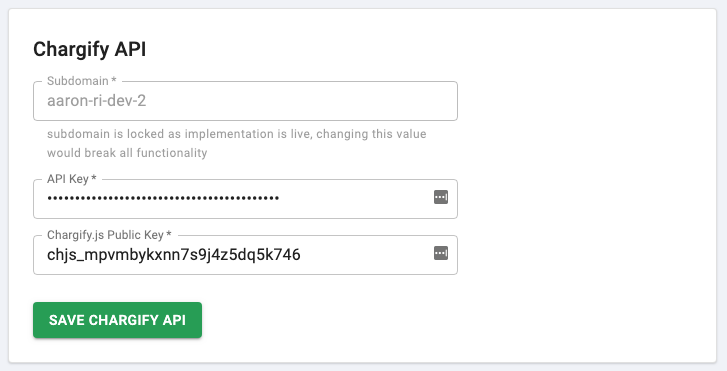
Pictured above: In-app onboarding panel for API Keys Configuration where gathered information should be entered.
Enter your Chargify API Key
- In your Chargify Account, navigate to "Config" → "Integrations"
- Click the "New API Key" button to generate a unique API Key.
- Next click the "Actions" dropdown next to your newly create API Key, and choose "Edit" (see image below)
- Enter "Chargify Commerce" as the API Key description, and hit "Save"
- Copy your API Key, and navigate back to the in-app onboarding panel, and paste the provided API Key into the "API Key" field.

Pictured above: Click the "Actions" dropdown to update the API Key Description
Enter your Chargify.js Public Key
- In your Chargify account, still within the "Config" → "Integrations" view, click the "Chargify.js" link in the left-side navigation
- Copy the "Public Key" (see image below)
- Paste the Key into the Chargify.js Public Key field in the in-app onboarding panel
- Click the green "Save Chargify API" button
- Navigate back to the in-app onboarding panel by clicking the orange banner at the top of the in-app onboarding panel to continue your onboarding.

Pictured above: Chargify.js Public Key to be copied in step 2 above
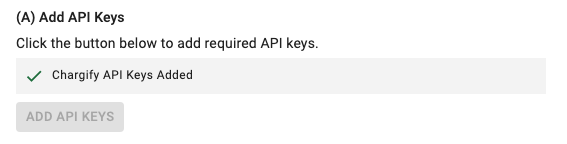
You should now see in the in-app onboarding panel that your API Keys have been confirmed. Continue to Step 2(B).
B. Configure Payment Gateways
NOTE: At this time, Chargify Commerce supports only Authorize.net, Stripe, and Braintree PaymentGateways. Payment Gateway credentials must be added to this App, your Chargify account, and your Bigcommerce store.
Next we will configure the Payment Gateway.
- Click the blue "Add Payment Gateway" button in the in-app onboarding panel
- Enable your preferred Payment Gateway. Note that you will need to enable the same payment gateway in each of Chargify Commerce, Chargify, and BigCommerce.
- Enter the required information for your payment gateway. This information should be available in your Payment Gateway account.
- Click the green "Save {Gateway}" button, and then click the link in the orange onboarding banner to continue your onboarding.

Pictured Above: You will see a green checkmark and 'Payment Gateway Added' after completing this step.
Next, we will add your Chargify Payment Gateway
- Click the blue "Add Chargify Payment Gateway" button to be taken to the correct panel in your Chargify account.
- Choose your Payment Gateway and enter the required information. Note that you must choose the same Payment Gateway and credentials as in the previous step.
- Continue to step 2(C) to configure taxes
NOTE: There is no in-app confirmation for adding your Chargify Payment Gateway. Simply continue to the next step.
C. Configure Taxes
Next we will configure your Tax Settings in your Chargify Account.
- Click the blue "Add Chargify Taxes" button to be taken to your Chargify account to configure taxes.
- Complete tax configuration by following the detailed Tax Configuration Documentation from Chargify.
- Once you have completed your configuration, return to the in-app onboarding panel to continue your onboarding.
NOTE: There is no in-app confirmation for Tax Configuration in Chargify. Simply continue to the next step.
D. Enable Webhooks
Next we will enable Chargify Webhooks.
- Click the blue "Enable Webhooks" button to navigate to the correct panel in Chargify
- Check the "Send Webhooks to my Webhook Endpoint(s)" checkbox (see image below)
- Return to the in-app onboarding panel to continue your onboarding.
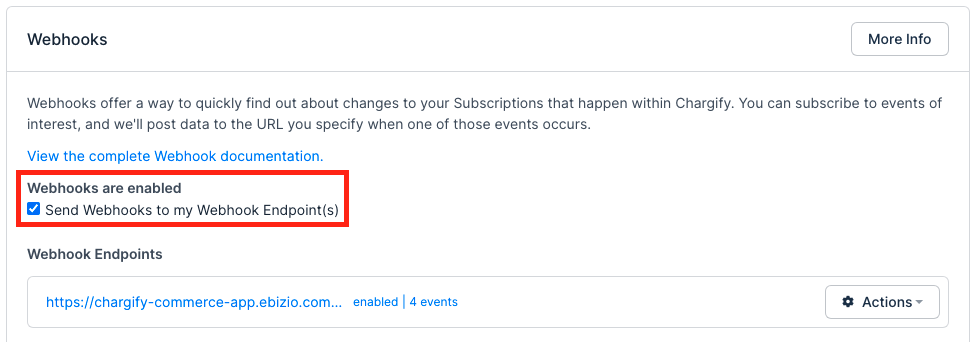
Pictured Above: Check the highlighted checkbox in your Chargify Account under "Config" → "Settings"→ "Webhooks"
NOTE: There is no in-app confirmation for Enabling Webhooks in Chargify. Simply continue to the next step.
E. Configure Dunning
Next we will configure Dunning in your Chargify account.
What is "Dunning?" Dunning is the process of methodically communicating with customers to ensure the collection of accounts receivable.
- Click the blue "Configure Chargify Dunning" button to navigate to the correct panel in Chargify.
- Complete dunning configuration by following the detailed Dunning Configuration Documentation from Chargify.
- Once you have completed your configuration, return to the in-app onboarding panel to continue your onboarding.
NOTE: There is no in-app confirmation for Dunning Configuration in Chargify. Simply continue to the next step.
Complete Step 2
Once you have completed each component of Step 2 (Configure Chargify), click the grey "Continue to Step 3" button in the in-app onboarding panel.